Friday 28 February 2014

Fixation Friday #2: L'Oreal Infallible 24Hr Foundation

I discovered this product about a week ago and I also found out that it is so easy to confuse it with another foundation by L'Oreal but this is 24Hr wear apparently.

Firstly, this is quite a lot different to the existing Infallible foundation and the packaging is obviously different.

Secondly, I usually struggle with L'Oreal (or drugstore for that matter) foundations as they are often too yellow or orangey which really doesn't work for me. However, this actually has is the right shade for me. L'Oreal doesn't ever seem to have pale enough shades either, so this was a lucky find.

This only costs about £9.99 (If my memory serves me right) which I think is a fantastic price but all that needs to be tested now is the quality, which is what it all                                                                                         comes down to really.

So far this is ticking the right boxes and I think that it will have to be my next beauty buy. Let me know what you think of this if you have tried it :)

Speak soon
Roo xx

Thursday 27 February 2014

Beauty Smackdown #5: Smashbox Full Exposure Mascara Vs Lancome Hypnose Star Mascara

 Come on now, if you are familiar with me, my blog or my YouTube channel then you will know that I hold both of these mascaras dear to my heart. But we all know that the purpose of these posts are to take two products which aim to do similar effects and find out which one is better value for money.

First of all, I first tried the Lancome mascaras after much thought about it because I knew that they are famed for the quality of their mascaras and I was nothing but impressed.

Smashbox, however was a whim to try. I had never tried any of their products so bought a sampler set and in the process they had a lucky dip and I managed to get my hands on the Full Exposure mascara.


 Both of these mascaras have pretty good packaging but the Lancome mascara is just sooo beautiful with all it's glitter and sparkles!

Hypnose Star contains 6ml of product and costs £22.50
 Smashbox Full Exposure has 11g of product (I think that's just under 11ml) and costs £18


So pound for pound the Smash box mascara is better value.
 The brushes are sooo different from one another.

Lancome's is very strange, one side is tapered (shown) and the other side is completely flat. This allows you to both lengthen and volumise.


Smashbox's is a little more of a traditional brush but it is huge!! You can really grip the lashes with this and get a lovely even coating.

The formulas in my opinion are very similar. They both hold a curl very well, they lengthen and volumise and they are very easy to reapply (as in they don't make your lashes crispy and stiff and practically rip out when you try to put more on). The last is very important to me because I feel that a lot of the time my lashes can get a little lack-lustre after a while and a fresh coat on top always helps.

In my opinion, you can't go wrong buying either of these but if you are in a pinch but want to treat yourself then I would totally recommend the Smashbox Full Exposure mascara (My winner :))

Let me know what you think of these products :)

Speak soon
Roo xx

Wednesday 26 February 2014

The Drugstore Edit #6: Elf Single Eyeshadow

Oh dear! Looks like I've been a bit busy today and just realised that I needed to do a post! Well here I am now :)

This week I am going to talk about the Elf Single Eyeshadow. I got this as part of my first very Elf purchase and I bought a tonne of stuff!

I don't have any swatch pictures (sorry!) but oh well :(

This is part of their Studio range which is their 'professional' range as opposed to the ones in the white packaging, so you expect the quality to be better - not that I have tried any of the shadows in the white packaging.

First of all, I love the packaging to this, it is very NARS-esque and makes the brand look more expensive. I like that it has a little window into the product so you can see the colour you are getting but I hate the stupid little mirror that really has no valid function.

The colour is lovely an the range as a whole doesn't have a lot of colour options but it's alright. Unfortunately the quality of the shadow was a bit rubbish to be honest. It was a little bit wishy-washy and pretty much the same quality of the huge palette that I tried (which you can totally read if you want!).

I'm not too let down by it because it was only something like £3.25 or something so no big loss!

If you are interested in trying this then you can buy it (along with some amazing products) at www.eyeslipsface.co.uk (If you're in the UK). I assume if you are in the US then you can find it all over!

Speak soon
Roo xx

Friday 21 February 2014

Fixation Friday #1: Clarisonic

Ahh I'm so excited to do this post. As you may or may not know, I have decided to add some additions to my posting schedule - Fixation Friday being one of them. This seemed like a great idea because there are loads of products I love or am desperate to try and I want to tell you about them, with the thought that some of you may have tried them and might be able to give me a first hand opinion.


This week I wanted to talk about the Clarisonic. This is a much hyped product and loads of people have tried it but I am yet to buy it (down to the fact I am skint). I will buy this because I am dying to get my hands on it. But let me tell you more about it.

I have literally heard people saying that the Clarisonic is like next level skincare, a whole new game!


What is it?:
So this one is the Clarisonic Plus, they do a few varieties but this one is for both face and body.

What is does is it has an oscillating brush head which you use to exfoliate and cleanse your face (or body). You put a bit of your favourite cleanser on the brush and it has a 1 minute timer and lets you know when 20 seconds has passed and that you should move onto a new section of skin (if I remember right).

Why do I need this?:
Well I have talked about this to friends and family and no one understands just ow much I actually need this.
I suffer from very dry patchy flaky combination skin. I believe that this would help buff away my dry flakes (ewww!) and leave me with amazing skin. But not only would it help me with that, it is supposed to be much much much more effective at removing makeup and dirt than by say using a flannel or something.

Imagine it like how electric toothbrushes are in comparison to regular manual toothbrush, whenever you see the adverts for them it shows you how much better it cleans and if you've ever used an electric toothbrush then you know the difference it makes. Now apply that to the Clarisonic, I get blackheads and breakouts a fair bit so this would help remove the dirt and prevent the breakouts.

Bonus about this, It's also great for fake tanning, you usually have to exfoliate before tanning to get the best results and again, this just makes life so much easier.

The only downside to this is the price.
The Plus is £179.00 and the Mia2 is £125 but the Mia2 is just for the face and I think 'Well if I need it for my body as well why would I buy the Mia2' and I'm not gonna buy that one because it's cheaper and then realise that I need the other too. I am just gonna have to get saving, unless someone wants to send me one for free :)

Let me know what you think of this product :)
Speak soon
Roo xx

Thursday 20 February 2014

Beauty Smackdown #4: Smashbox Photo Finish VS Maybelline Baby Skin

Ahhh, another Thursday, another edition of Beauty Smackdown. I have wanted to do this one for a while because I know both products are quite hyped up. I know some people have said that Baby Skin is a dupe for Benefit's Porefessional. However, though I have not yet tried Porefessional, Baby Skin looks like it could be more of a dupe of Smashbox's Photo Finish. I have tried Photo Finish and I feel it matches Baby Skin identically. But lets get on with it.

So I have the full size of Baby Skin and only a (very empty) sample size of Photo Finish.

I really like the general packaging because I don't feel like I'm being cheated when I get a squeeze tube because I know I can get all the product out.
 Smashbox is on the left and Maybelline in on the right. They look exactly the same, they feel exactly the same, smell exactly the same and do exactly the same.

They have a silicone feeling and both have mattefying finishes.

So in actuality I think these are pretty much the same product but with a massive price difference with Maybelline Baby Skin at £7.99 and Smashbox Photo Finish at £25.

Although I would totally recommend the Smashbox primer I think you are better off saving your pennies as my winner this week is Maybelline Baby Skin!

Let me know if you have tried either of these products and if you agree with my choice or not :)

Speak soon
Roo xx

Wednesday 19 February 2014

Update on Amazing Deals!

I love finding a bargain, I think everyone does, so I thought as an additional post today I would just quickly tell you about some deals I found.

Yes I know this is going to be region specific and I'm sorry to anyone who can't get to these places but I bet that you can find them somewhere. Just take a look in the bargain store that you wouldn't want to be seen it, they might just surprise you.

So I live in Newcastle upon Tyne in the UK and recently I went shopping in Xtras and I told you all about the amazing deals I found in there. Weeelllllll, I went back and I found some OPI nail polish for only £5.99 and I was literally passing out with excitement, shame the colour selection wasn't that good.

This is not where my story ends dear children, because I then went to TJ Hughes, another bargain shop. I found more OPI and this was only £4.99 and they had pretty good colour selection too!! I will be going back there, I promise.

Still, finally I was in Wallsend with my sister yesterday and we went into the 99p store which is a total novelty because it seems funny that a shop is trying to compete with a poundshop. They were selling OPI and China Glaze for, you guessed it, 99p! But the downside was that they only had the crackle formulas.

So if you live in the Newcastle upon Tyne area and fancy some cheap high-end polishes then have a look at these shops :)

Roo xx

The Drugstore Edit #5: MaxFactor Eyeshadow Trio in Coco Crazy

I can't believe that I am already on my 5th one of these! This week I have one of the MaxFactor eyeshadow trios in Coco Crazy. Now I think you should be warned, I had had this for a while and it's showing some wear and tear but the product is fine!


 As you can see , it is a little worse for wear but oh well!

It says new but I assure you, it's not.

the packaging is actually still pretty good, it clips shut and the hinges aren't broken at all.
 On the inside: I have hit pan on one of the colours but there is quite a size difference for the colours, I assume they give you more of the lightest colour because you will probably use that all over your eyelid.

I love the colours though, they are perfect neutrals. There is a great balance between the champagne nude, chocolate brown and taupe shadows. They are all lightly shimmery in the trio but I'm not sure about the rest of the collections.

Here, I have swatched them in order and they aren't the most fantastically pigmented things, especially since I have been exposed to Urban Decay, but they do alright and I think they're perfect for make up beginners or teenagers as (specifically in the trio) the colours aren't over the top.

I am also not a massive fan of how the colours aren't separate but I can live with it.


all in all I think I would give these a 6/10 because the packaging is sturdy, the product is alright and because I have a bit of an affinity for them, they were after all one of the first sets of eye shadows I had tried.

If you are interested in getting your hands on this then you an get it from Boots or I imagine any MaxFactor stockist for £6.99

Speak soon,
Roo xx


Sunday 16 February 2014

Vaseline Spray and Go First Impression/ Happy 100th Post To ME!!

It's is officially my 100th post on my blog and whilst this post isn't particularly special at all I couldn't think of anything better. I may do something special later - not sure.

Anywhooo, I literally applied this 5 mins ago so you know that my thoughts are going to be damn strong!
 I legit think I am in love with this thing! Let's just firstly put that out there because I can't stress how much I like it and I am going to tell you whyyy.....

- Firstly, just take a look at the packaging, I know I don't have a full picture but google it. Honestly I thought this was just going to be a ridiculous novelty that would be of no worth to anyone but how wrong was I. The (continuous) spray can is a genius idea! I am not one for dipping my hands in a pot or squeezing things out of tubes because for some reason it feels like too much effort (I'm so lazy haha!). But this, hands down, is super easy to use.

- Secondly,continuing on the first point. You know when you have applied a little moisturiser and then you go back to apply more and suddenly it becomes so infinitely difficult because your hands just slip all over? Well say good by to that nonsense! This stuff drys nicely and doesn't leave you feeling greasy or stick at all.

- Thirdly, the product is so easy to rub into the skin and you really don't need that much product at all, which is nice.

- Lastly and this is probably the biggest thing for me, I managed to put on a tight fitting top and skinny jeans with no difficulty! I have tried other moisturisers in the past *Cough* Nivea In Shower Moisturiser *Cough* and I can only use then If I had made the conscious decision to not wear jeans or a tight fitting top because there is no way in hell they will even pull up.

I literally don't have anything bad to say about this product and only time will tell how long this can lasts and I'm hoping it's going to be in my routine for a long time :)

Have you tried this product? Also What moisturisers are you currently loving?

- Roo xx  

Saturday 15 February 2014

New Schedule

I feel like I do this all the time.
I have planned this out but don't hold me to it. Let's face it, I'm not that reliable.

So I wanted to do more blog/YouTube related things during the week and so I have devised a schedule and this is more of a guideline. It is as follows:


Makeover Mondays: I will try and post a video with a new makeup tutorial every week.

Talk Tuesdays: I'm not to sure about this one but I would like to start doing 'Get Ready With Me' videos but the ones where you do a general talk. I wanted to make this topic based and it wasn't going to be anything serious and very makeup/skincare oriented. I need to work this one out a bit more so it will be a while before you see any of this.

The Drugstore Edit (Wednesday): If you read my blog regularly then you know the drill with this. I choose a drugstore product and give it a full review. I want to make this weekly.

Beauty Smackdown (Thurday): Same rules apply as the above, I take 2 products not necessarily drugstore vs high end (though some weeks will happen that way) and compare them pound for pound and tell you my favourite. I also want to make this a weekly thing.

Fixation Fridays: I think I am most excited to introduce this one. Essentially I will dedicate one post a week to a product that I am obsessed with. This won't always be something that I own but could be something that I really want to buy.

Saturday and Sunday will be rest days for me unless I have something that I want to post about.

I hope you are all as excited for my schedule as I am and hopefully I will have a new video up for you on Monday!

Speak soon
- Roo xx

I Felt A Shop Coming On and Did Something About It

Yes it is Valentine's Day and to be honest I'm not fussed by it. I have someone but we don't celebrate it, not to mention he works on Fridays. So I spent my day with someone in the same situation!

So I went out with Catherine (Her blog -> http://bigbookssmallgirl.blogspot.co.uk ) today for another glorious shopping trip and I may have treated myself a little but that's ok because I haven't bought anything for a very long time so I am overdue!

Though I did buy a few clothes and a candle I'm not going tot talk about those and I'll just get on with the makeup.

 First up is the Vaseline Spray & Go Moisturiser. I was a little skeptical about this which only made my curiosity stronger. I got the cocoa butter formula because I generally like the smell.

It was £3.99 from Boots as they currently have £1 off :)

I'll keep you updated with my thoughts on this product as well as others featured in this post.

 I gave in and got one of the new Naked Lipgloss thingies. I got this in the colour 'Nooner' which I don't know if it is suposed to be the same as in the Naked 3 palette but given how UD are with keeping the colours the same throughout their makeup then I will assume that it is. I can always check though.

 All of the shades in this collection are very sheer and super neutral. This one has very minimal shimmer so I haven't so far experienced any horrible chunky glitter as the product dried but it could be different in other colours.

This retails for £14 from Urban Decay counters.
 I also have been after a colour correcting primer for a while. Now I could have paid out a fair bit for something that doesn't actually work for me but I got this for the amazing price of £1.99!!

Also it's not a brand I' super familiar with, it's called W7, if anyone has tried this brand before then do you have any recommendations?

 It does feel quite oil based but it does sink into the skin and feel quite silicon- like and smooth. I probably wouldn't recommend this to anyone who has oily skin though, but I will let you know how I get on with it :)
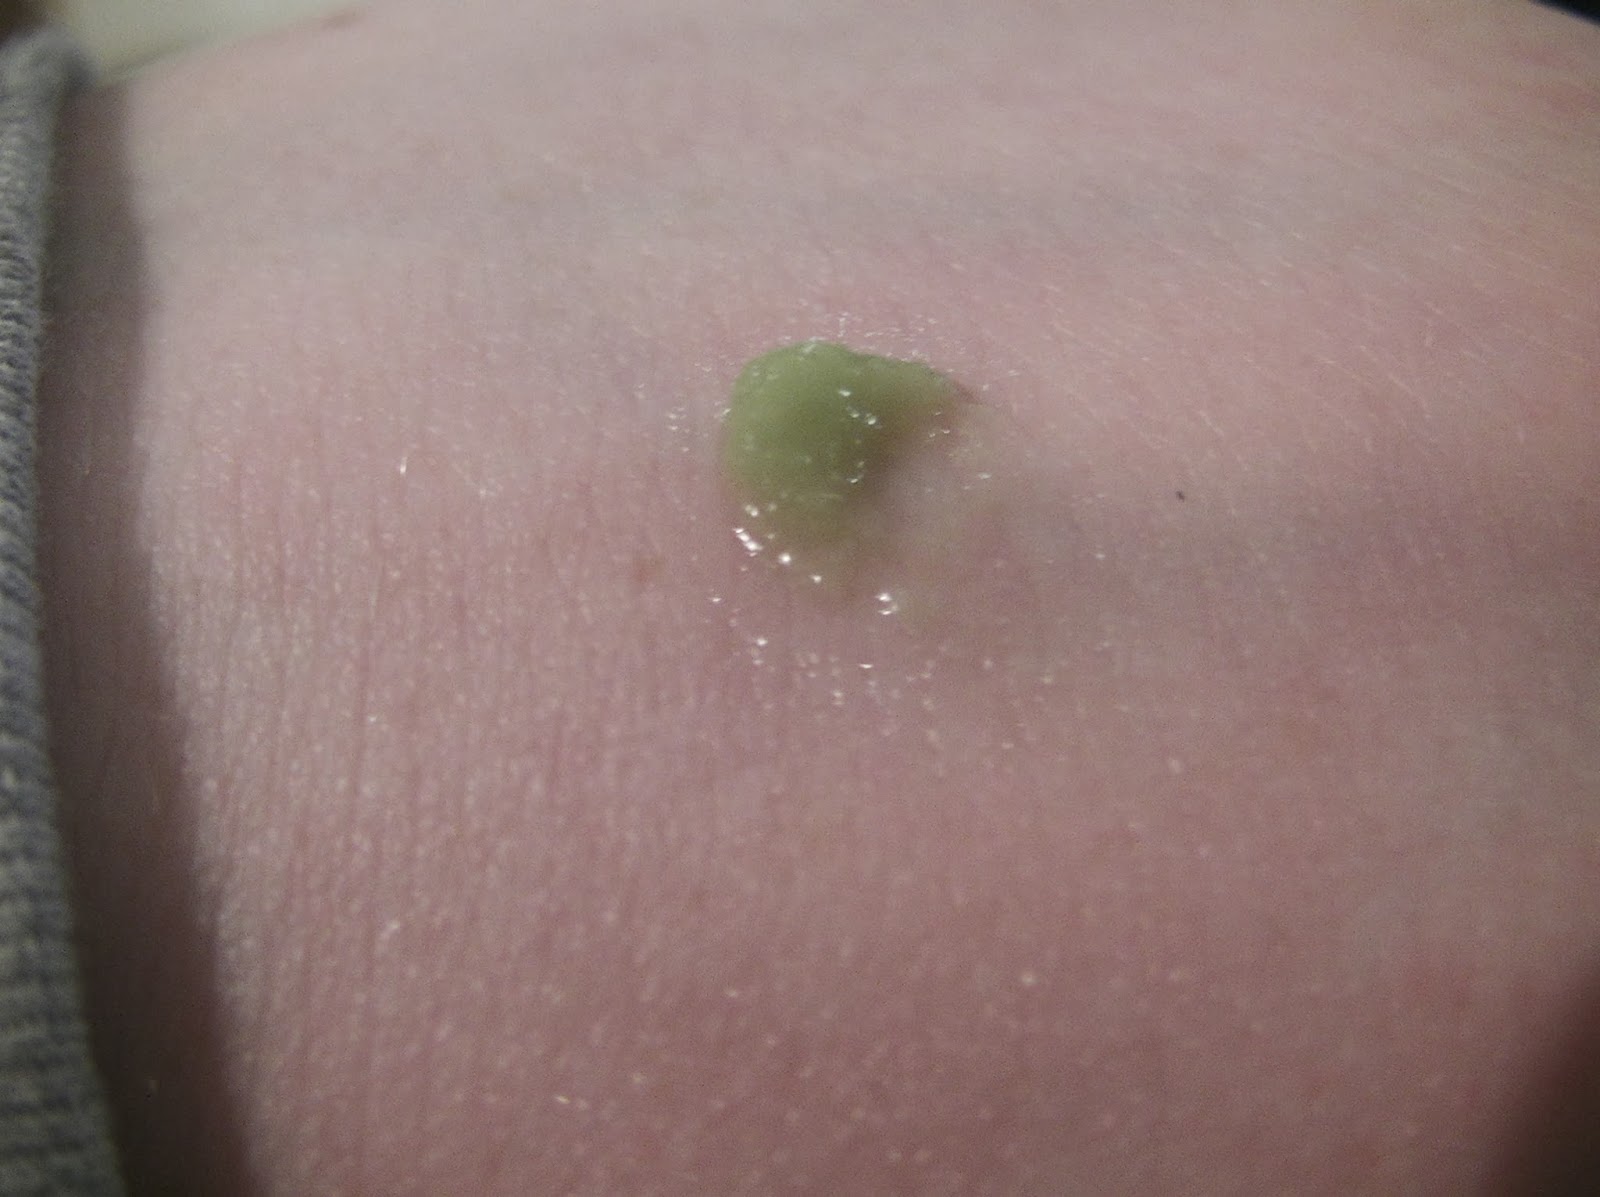
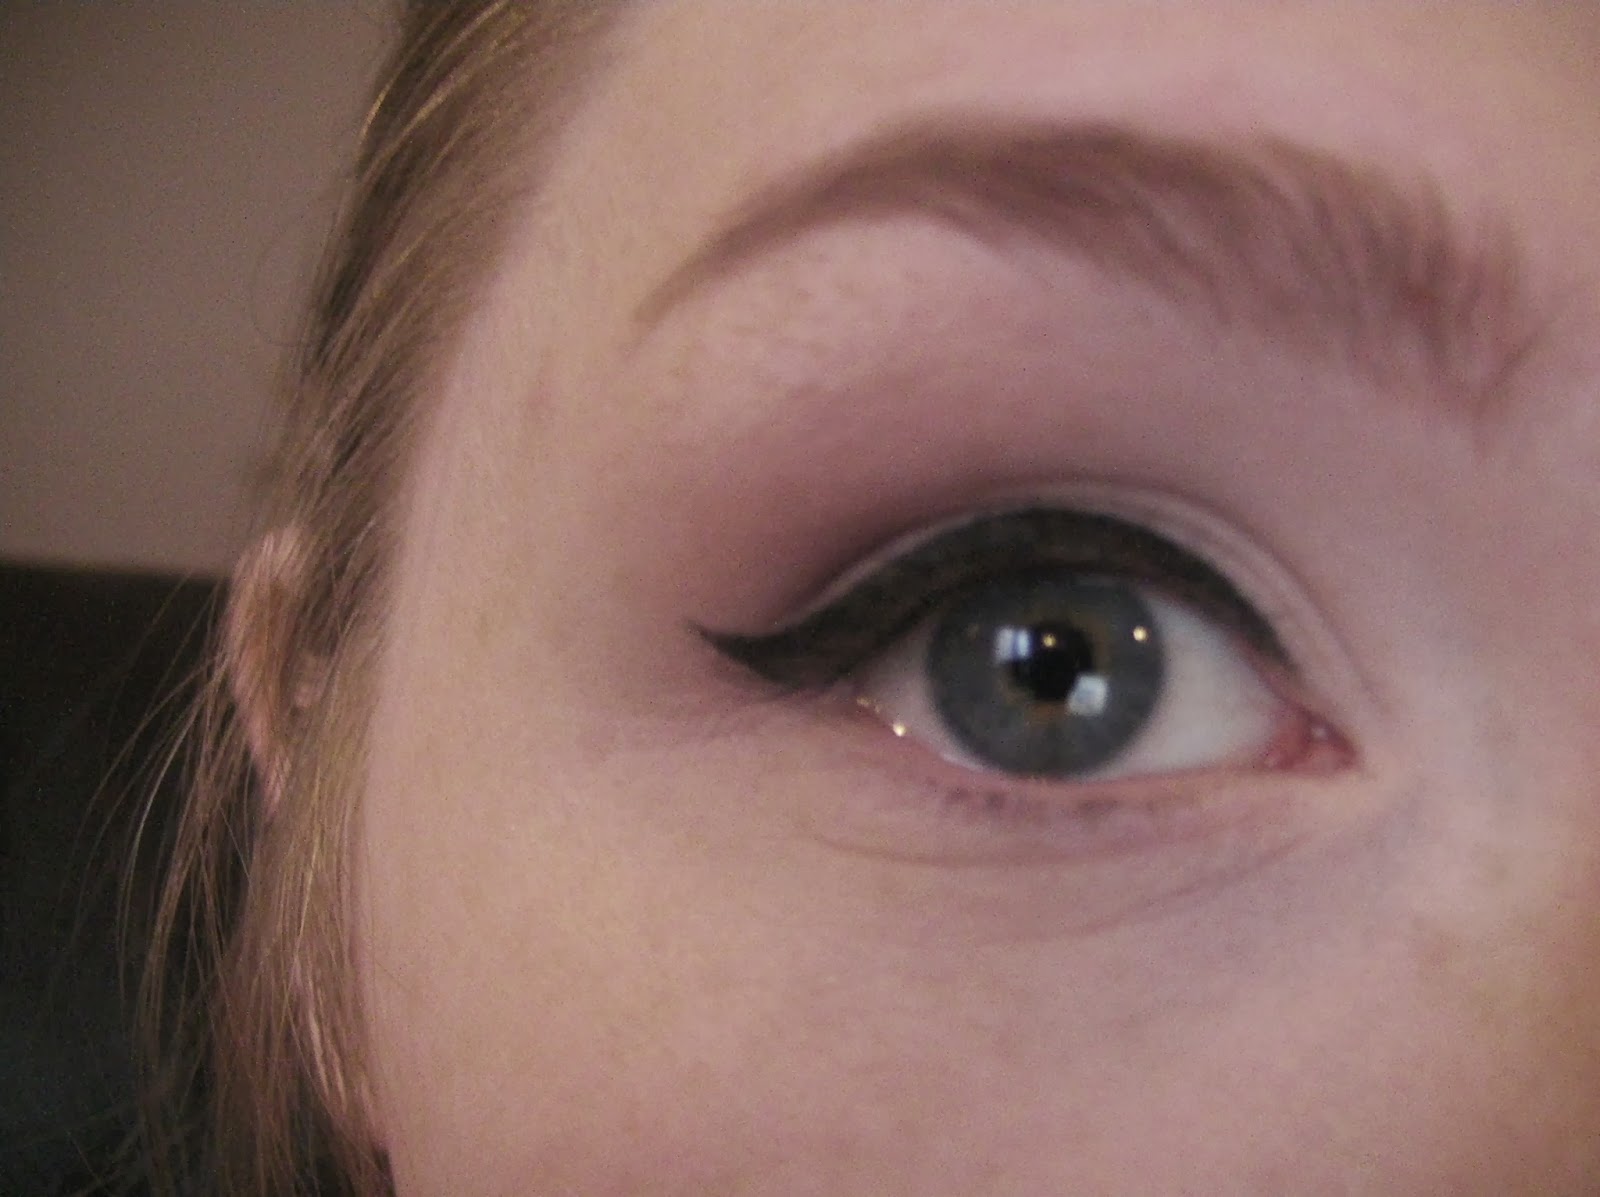
 I was also in need of a new pencil eyeliner, I don't use it all that often but I do like to tightline my eyes.

This is by Collection and I think it was only about £2.49 from Boots
 It is very soft so I'm not sure about the staying power but for the price I can't complain.
 I gave into the hype!

I skirted round this for a while but it's worth trying once right? It feels very silicon like and given the mixed reviews I'm really not sure what I'm going to think of this.

I think I paid £7.99 so it's not unreasonable.
 It is clear and as I said a very silicon- like texture, though I know a lot of people are saying that it's a dupe for the Benefit Porefessional but I think that it's probably closer to being a dupe for the Smashbox Photo Finish Primer purely based on the look and the consistency.
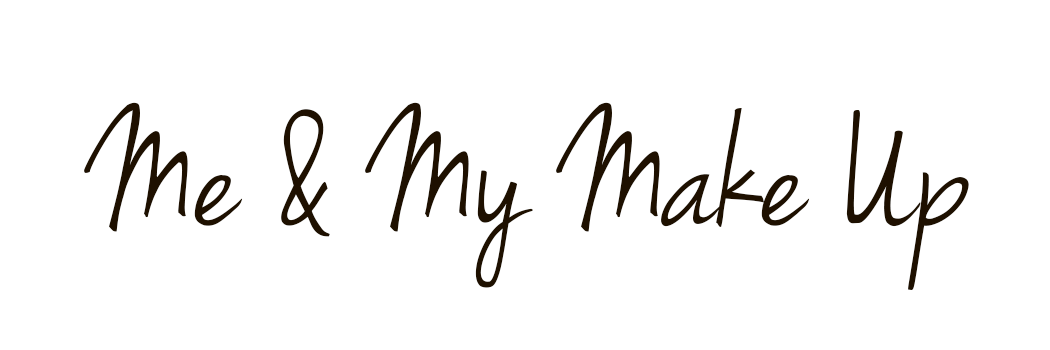
 Again, I went back to Xtras (where I have gotten some great deals and managed to get an OPI nail polish for only £5.99 which is amazing considering they usually retail for £11.50 ish. The only downside was that there wasn't a massive colour selection but I got this one because I don't have anything like it in my collection, it's a sort of olivey- green, which I love.
 Another new-ish release in the beauty world - The Hourglass Ambient Lighting Blush. If you don't know about it then where on earth have you been!

I love Hourglass packaging and I have wanted to buy something from them for a long time but it's a lot of money (for me at least). So I am officially no longer an Hourglass virgin (Wahooo!!)
I got the Diffused Heat blush and it just looks so amazing, I swatched it as soon as I had my hands on it and it is just so smooth and blendable and soooo pretty!!!
 Haha, when me and Catherine were in Xtras we saw these lucky dip bags and for £1 it's worth a laugh

Essetially you get a mix of 5 things and they are usually very cheap and just novelty.
This is a combination of what Catherine and I got. She took what she wanted from them and then I had a look at the rest.

From this I got the Maybelline nail polish (made my money back, yes!!) one of the hearts, one of the yellow pots, and the browny lipstick. I also got this purple eyeshadow duo which I forgot to put in and I sort of want to try it because I feel like it could be one of those hidden gem products.


That was everything that I got from my little shopping trip :) I hope you enjoyed seeing it all. Keep an eye out for future posts where I will do reviews and first impressions - you know the deal.

Speak soon
Roo xx

Wednesday 12 February 2014

The Drugstore Edit #4: Elf Shimmer Palette

Todays post is another elf product and I have quite a few to review.

 So this is the Shimmer Palette. To be honest I bought this and din't really know what I was going to do with it and I haven't really used it that much.
 The colours are basic but perfect. They are all pretty much highlight colours but the last is like a blush/highlight and it just adds a nice amount of dimension to the face.
 Going from left to right, this is the white highlight which is really beautiful. Its just a plain straight down the middle highlighter.

These are a cream based formula so blend really smoothly and I find that you can apply a small amount for a subtle sheen or build it to be a little more intense.
 The second one is somewhere between a blush and bronze colour which is totally appropriate for lighter skin tones. I mean the palette as a whole isn't dark but if you just want to add a small amount of warmth then this would definitely do it and be able to give you a bit of blush colour.
 This is the darker bronze colour and like I say its not particularly dark so this is perfect to add a warm glow. I wouldn't use this as a contour as it's shimmery but you can definitely liven areas.


Finally this is the blush colour, again it's not massively dark so if you're going for a full face of make up then I wouldn't choose this as a blush but for more natural days where all you're wearing is a bit of tinted moisturiser and some mascara the this would certainly be my pick.


Honestly I don't use this palette as much as I should because it is very good. The only downside is that I have tried to apply in on my eyes in the inner corner for highlight and it is sooo easy to crease but it does work on the brow bone. Generally where you would usually highlight is the place to apply this.

This only retails for £3.75 which you can't really scoff at.I bought it on a whim of wanting to try more Elf products and I'm glad I did. I give this product an 8/10 purely because I like it but it creases so it has limited uses. If you are interested in this product, or any Elf products for that matter, you can purchase it here --> www.eyeslipsface.co.uk


Talk soon :)
- Roo xx


Monday 10 February 2014

Valentine's Day Makeup Tutorial

Ahhh it's nearly that sweet time of the year for lovers.

But don't fret, even if you don't have plans you can always still get dressed up and treat yourself!


So here's my Valentine's day makeup tutorial!


- Roo xx

Thursday 6 February 2014

Beauty Smackdown #3: MAC Penultimate Eye Liner VS Collection Extreme 24 Hr Felt Tip Liner

MAC Penultimate Eye Liner 
VS
Collection Extreme 24 Hr Felt Tip Liner

I am really enjoying doing these posts and I hope you all enjoy them too! I really feel like I get to give you a great insight to how products compare to one another and help you all make good makeup decisions!

 Collection Extreme 24Hr Felt Tip Liner

Pros:
- Comfortable shape
- Really pigmented
- Good control (nib isn't too soft and isn't too hard)
- Super affordable
- Lasts a long time (this might be different on oily skin)

Cons:
- Not Waterproof

Yeahh So basically I love this product, I got it on a whim though because I wanted to try a drugstore liner, well just because and it ended up being a product that I really love!


MAC Penultimate Eye Liner

Pros:
-Comfortable shape

Cons:
- Nib is far too soft
- Pigment isn't amazing
- It's difficult to get the colour out
- Smudges


I don't know if I just got a faulty one of these because I would have had high hopes that MAC would have a super high quality liquid liner but it is really awkward to use because the nib is too soft and you have to press quite hard just to get a decent black out of it.

The Collection has a longer nib and is a lot stiffer than the MAC one.

The Collection liner also manages to get a finer controlled line and well a chunky lines.
The 2 left lines are MAC and I have tried to show a fine line and a thick line and I managed to get the colour out on the thick one but the line was messed up from pressing s hard and the fine line was a really rubbish pigment.

The 2 right lines are Collection and you get the same pigment in thick and fine. It glides on so smoothly and just looks flawless.


It won't come a surprise then if I say that the Collection 24Hr Extreme Liner is miles above in quality than the MAC liner. Especially considering the price differences as MAC is £17.00 and Collection is £2.99 it is a serious bargain! Try the MAC one if you are dead set on it but read the reviews on their website, suffice to say I cannot recommend the Collection liner more!


Let me know what eyeliners you are loving and what are your opinions on these liners if you have tried them.
- Roo xx

Wednesday 5 February 2014

How To Get The Perfect Eyeliner

Recently I did a post about how to get perfect red lips and I thought I would continue this series by talking about eyeliner. It can be super frustrating trying to get your eyeliner to match and just look generally great. I personally have totally ruined my make up because I messed up on the eyeliner and it can really put me in a mood when my makeup doesn't go well.

So without further ado (and I fear that this could be a long post) I'm going to get on with it!

1. Clean Canvas
Obvious stuff really, you never apply make up to a dirty face. So I've made sure my face is clean and the rest of my makeup is applied apart from the eyes.
 2. Eyeshadow
I know that eyeliner can have a tendency to shift and fall into the crease so I have prepped my eyelids with a primer and some eyeshadow. I have used the Elf Eyelid Primer and Limit, Nooner and Strange from the Urbadn Decay Naked 3 palette.
4. Down to the nitty gritty
So here is a series of pictures to show you how I do my eyeliner:

- Draw a fine liner close to the lashes in the centre of the lid, I find that this helps me get my bearings and makes the rest of the liner easy to apply.


I've just drawn a thin line right across the lashline and you could leave it like this if you just want to intensify the volume of the lashes.
 Now I'm just building on the thickness of the line and because I already drew in the original line then it has made this a lot easier. I'm starting from the middle and then filling in either side,
 Again you could just leave it like this if you don't want to wing it out and just add some mascara to complete the look.

 I don't know if it's difficult to see or not but I have drawn a mark where I want the liner to come to a point, this makes it easier to make both eyes even because it gives you a chance to double check that it all lines up.
 Connect the bottom line to the point
 And then make a top line from the point back to the lash line and make sure it blends in smoothly.
 Now you can just fill in the gaps, I recommend using a liquid pen liner or a sharp pencil liner if you're a beginner, mainly because you should be used to the feel of a pen/pencil whereas a brush may feel a little alien.
 If you're super comfortable and confident you can really darken the look by taking a pencil eyeliner (preferably a soft textured and long wearing one)
and tightline your eyes. 'What is tightlining?' I hear you say, well this is just lining your upper lashline with eyeliner, it sounds scary and is quite scary when you first try it but it is all about confidence. It is totally worth it though.


Now just finish by curling your lashes and applying some mascara.


So here's a nice little run down of my top tips for you!

1. Keep clean - make sure that all your equipment is sterile, remember this is going near your eyes and if your stuff isn't clean then you could end up with an infection - yuck!

2. Use a pen/pencil if you're a beginner - Like I say I think this is the best option for beginners because you're probably used to the feel of a pen/pencil.

3. Guidelines, it is much easier to apply liner if you set yourself out some guidelines. mark the thickness and length of your liner and it jut becomes a game of connect the dots.

4. Cotton buds/Q tips - It's easy to make mistakes but it's nothing that a little makeup remover and a cotton bud can't fix, they are super handy and help make your liner look sharp.

5. Tape! If you're having an issue making a wing the take some tape, just press it on the back of your hand to lose some of the stickiness and then place it on your eye from the outer corner going outwards at the desired angle that you want your wing to be and then it just becomes foolproof! Once you're done you can remove the tape and you'll have a super crisp line.

6. Black shadow - sometimes you can come across eyeliner that just takes an absolute age to dry, I recommend using a fine brush and applying some matte black shadow over the wet liner to set it. It will stop the liner from smudging too :)


If you have any great suggestions about liner then let me know in the comments!
- Roo xx